Crescent Bay (quest): Difference between revisions
(Created page with "''This article is about the quest. For the location, see Crescent Bay'' =Lore= =Description= =Prerequisites= =Mechanics= =Rewards= =Other Items= =Patch Notes= =External Links=") |
No edit summary |
||
| (12 intermediate revisions by the same user not shown) | |||
| Line 1: | Line 1: | ||
{{Incomplete|details=Lore<li>Summary Description<li>Additional screenshots from first part of quest}} | |||
''This article is about the quest. For the location, see [[Crescent Bay]]'' | ''This article is about the quest. For the location, see [[Crescent Bay]]'' | ||
{{Quest | |||
|title=Crescent Bay | |||
|image=Crescent Bay (quest).png | |||
|questgiver=[[Collier]] | |||
|location=[[Crescent Bay]] | |||
|rewards=[[Bumble Bee's Honeycomb]]<br /> | |||
[[Yarr's Blunderbuss]]<br /> | |||
[[Honey Barge]]<br /> | |||
32 [[Gold]]<br /> | |||
1 Arrow | |||
|medallion=[[Quest Medallion (Crescent Bay)|Quest Medallion]] (5%) | |||
|prev=[[Ebonglade Part 1]] | |||
|next=[[Cloud's Rest (quest)|Cloud's Rest]] | |||
}} | |||
=Lore= | =Lore= | ||
| Line 6: | Line 20: | ||
=Prerequisites= | =Prerequisites= | ||
This quest does not have any prerequisites. It can be done as the first quest if desired. | |||
=Mechanics= | =Mechanics= | ||
'''''This section contains solutions to puzzles encountered in Crescent Bay. Players are encouraged to try to solve them on their own before referring to this section. Lore spoilers will be avoided but some minor spoilers may be unavoidable.''''' | |||
[[File:Crescent Bay Map Labelled.png|thumb|Labelled map of Crescent Bay]] | |||
This quest begins by speaking to [[Collier]] on the ground floor of [[The Citadel]] who will give the player a [[Sticky Compass]] which guides them to Crescent Bay. | |||
==The Secret of Crescent Bay== | |||
''Note: This short section is optional, as it just provides the players with the information needed to complete the quest. The sections afterwards can be completed even if these steps haven't been done.'' | |||
Players begin by speaking to [[Jingles]] in the Tavern (marked 9 on the map) who sings them a [[Jingles#Shanty_Lyrics|Shanty]]. This tells them that to find the secret they must "look up from the ocean floor". | |||
Using this information, players should head to the ship that is docked at the central pier opposite from the tavern. By swimming around the stern of the ship and looking up, players will see some sparkles highlighting a trapdoor which players can enter. Once inside a smuggler tells them that they will reveal passage to the secret of Crescent Bay if the player gets an IOU. | |||
==Obtaining a Pirate IOU== | |||
''Note: Players only need to complete this section once as the Pirates IOU can be retained. If they already have it, they can skip to the next section.]] | |||
Players can now run around all the various vendors to see what each of them wants. There is a long list of trades required to obtain the [[Pirates IOU]] from [[Carswell]] (building 8). At the end of that chain is an item that can be purchased with [[Gold]]. Gold can be found in various barrels and chests around Crescent Bay, which regenerate approximately every 15 minutes. Most only contain a few Gold, but there are three places which generate large quantities of Gold: | |||
* Timmy's College Fund (Building 2) | |||
* The cargo hold of the ship docked at the Eastern Pier (Location A) | |||
* The deck of the ship at the Central Pier, accessed via the secret trapdoor at the stern (unmarked ship) | |||
Players will need to accumulate 44 Gold to begin the trading chain for the IOU. The full chain is as follows: | |||
* Spend 44 Gold to obtain the [[Yew Shortbow]] from Peabody at Arrows and Iron (building 15) | |||
* Give the Yew Shortbow to [[Cuthbert]] in the alley down the side of the tavern (location C) in exchange for a [[Rune Essence]] | |||
* Give the Rune Essence to [[Everild]] at the Rune Shop (building 1) in exchange for a [[Fire Rune]] | |||
* Give the Fire Rune to [[Langdon]] at Iron and Arrows (building 15) in exchange for 10 [[Cannon Ball]]s | |||
* Give the 10 Cannon Balls to [[Artemis]] on the bridge of the ship docked at the Western Pier (location D) in exchange for a [[Redberry Pie]] | |||
* Give the Redberry Pie to [[Thurgo]] at his shop (building 7) in exchange for a [[Blurite Sword]] | |||
* Give the Blurite Sword to [[Carswell]] at his shop (building 8) in exchange for a [[Pirates IOU]] | |||
===Optional Rewards=== | |||
* Following the first 5 steps of the trade chain again for a second [[Redberry Pie]] and obtaining an additional 64 Gold will allow the player to purchase [[Blurite Leggings]] from Thurgo (building 7) | |||
* Various other trades for Gold are available. Those are listed [[Crescent_Bay#Vendors|here]]. | |||
==Leviathan== | |||
[[File:Crescent Bay Trap.png|thumb|A fake save point which is a trap]] | |||
With the Pirates IOU in hand, Players can return to the secret entrance to the ship docked at the Central Pier and throw the IOU onto the red square. This opens a secret door which closes behind them. Players can talk to [[Scared Pirate]] who will tell them that this ship is Leviathan and ask them to defeat the beast below. They are provided with a [[mc:Bow|Bow]], 64 [[mc:Arrow|Arrow]]s and 16 [[mc:Honey Bottle|Honey Bottle]]s. Leviathan contains a parkour course involving slime block launchers that are activated by shooting target blocks, and sliding on honey blocks. Players should follow the course until they reach the end. Players will receive [[Mead]] and [[mc:Snowball]]s along the way to help them. | |||
Towards the end of the parkour course is a room labelled "Yarr" which looks like a save point. This is a trap. If players enter the room, they will fall into the [[mc:Powder Snow|Powder Snow]] and end up in jail. Players should ignore the room and continue the course. | |||
There is also secret reward available, which is the [[Yarr's Pantaloons]]. This can be found by exploring off the beaten track a bit. The solution to finding it can be found [[Yarr's_Pantaloons#Abilities_and_Uses|here]]. | |||
At the end of the course, player's reach the lorebook [[Crescent Bay 7]] and a big hole to jump down which leads to the boss chamber. | |||
==Yarr's Hive== | |||
[[File:Crescent Bay (boss).png|thumb|The boss chamber]] | |||
Player's land at Yarr's Hive and find a save point which they should use. The save point room also contains the lorebook [[The Fate of Yarr]]. They can then progress until they reach a rail. They are given [[Yarr's Blunderbuss]] and a minecart called the [[Honey Barge]] which can be placed on rails in adventure mode. The player will automatically be refilled with arrows when they are used. Place the Honey Barge on the rail and press the button to begin the boss fight. | |||
Whilst in the boss room, players are given Slowness VII which prevents them from walking. However they are able to jump. It is intended that the player should remain in the Honey Barge at all times. If they leave the Honey Barge, a new one will be added to the last slot on their hotbar for them to place. [[Yarr]] is in the room flying around on [[Bumble Bee]], however both are immune to normal damage. Players can only win this fight by activating the cannons in the roof. | |||
The player must first shoot several targets to progress around the lower track and rise up the ramp to the upper track. Shots need to be timed so that the block moves out of the way as they attempt to pass. Once up onto the upper rail they will start going around in circles on that track. They must always shoot the targets that are in the shape of a plus symbol as they pass, or else they will fall back down to the lower level. The main challenge of the upper level is three consecutive slime block launchers that must be activated at the right time to shoot the minecart up to the next one. If all three are successful, players will reach the roof track. | |||
[[File:Bumble Bee (wisp).png|thumb|A wisp indicating the location of the boss]] | |||
Players will progress around the roof area on a track which takes them around several target blocks. Each of those target blocks activates a cannon which shoots straight downwards, and players must attempt to activate a cannon just as Yarr and Bumble Bee are directly below it. To aid in targeting, a white wisp floats around the roof area indicating the boss' position. Once a direct hit has been made, the cannons will need to recharge and this won't occur until Players return to the lower areas of the room. | |||
A total of three direct hits are needed to defeat the boss. After defeating it, they player is teleported out of the dungeon and back to safety in the hold of [[Artemis]]' ship with their reward. | |||
=Rewards= | =Rewards= | ||
Completing the quest grants a the [[Honey Barge]], a single [[mc:Arrow|Arrow]], and a [[Reward Bag]] which contains: | |||
* [[Yarr's Blunderbuss]] | |||
* [[Bumble Bee's Honeycomb]] | |||
* 32 [[Gold]] | |||
Players will also obtain the [[Pirates IOU]] during the quest and have the opportunity to earn then [[Blurite Leggings]] and [[Yarr's Pantaloons]]. | |||
=Other Items= | =Other Items= | ||
The following other items are used in the quest: | |||
* [[Yew Shortbow]] | |||
* [[Rune Essence]] | |||
* [[Fire Rune]] | |||
* [[Cannon Ball]] | |||
* [[Redberry Pie]] | |||
* [[Blurite Sword]] | |||
=Patch Notes= | =Patch Notes= | ||
= | =Gallery= | ||
<gallery> | |||
File:Crescent Bay (quest).png|The beginning of the Leviathan parkour course | |||
File:Crescent Bay Trap.png|A fake save room | |||
File:Crescent Bay Secret 2.png|Secret room | |||
File:Crescent Bay (boss).png|Boss chamber | |||
</gallery> | |||
=Relevant Videos= | |||
<youtube>https://www.youtube.com/watch?v=aVDf-Iu-tc0 How to Use the Clone Command]</youtube> | |||
<youtube>[https://www.youtube.com/watch?v=uO8Q2wY9Ycs How to Use the Give Command]</youtube> | |||
Latest revision as of 09:24, 6 January 2023
This article is about the quest. For the location, see Crescent Bay
| Crescent Bay | |
|---|---|

| |
| Questgiver | |
| Location | |
| Rewards |
Bumble Bee's Honeycomb |
| Medallion |
Quest Medallion (5%) |
| Previous | |
| Next | |
Lore
Description
Prerequisites
This quest does not have any prerequisites. It can be done as the first quest if desired.
Mechanics
This section contains solutions to puzzles encountered in Crescent Bay. Players are encouraged to try to solve them on their own before referring to this section. Lore spoilers will be avoided but some minor spoilers may be unavoidable.

This quest begins by speaking to Collier on the ground floor of The Citadel who will give the player a Sticky Compass which guides them to Crescent Bay.
The Secret of Crescent Bay
Note: This short section is optional, as it just provides the players with the information needed to complete the quest. The sections afterwards can be completed even if these steps haven't been done.
Players begin by speaking to Jingles in the Tavern (marked 9 on the map) who sings them a Shanty. This tells them that to find the secret they must "look up from the ocean floor".
Using this information, players should head to the ship that is docked at the central pier opposite from the tavern. By swimming around the stern of the ship and looking up, players will see some sparkles highlighting a trapdoor which players can enter. Once inside a smuggler tells them that they will reveal passage to the secret of Crescent Bay if the player gets an IOU.
Obtaining a Pirate IOU
Note: Players only need to complete this section once as the Pirates IOU can be retained. If they already have it, they can skip to the next section.]]
Players can now run around all the various vendors to see what each of them wants. There is a long list of trades required to obtain the Pirates IOU from Carswell (building 8). At the end of that chain is an item that can be purchased with Gold. Gold can be found in various barrels and chests around Crescent Bay, which regenerate approximately every 15 minutes. Most only contain a few Gold, but there are three places which generate large quantities of Gold:
- Timmy's College Fund (Building 2)
- The cargo hold of the ship docked at the Eastern Pier (Location A)
- The deck of the ship at the Central Pier, accessed via the secret trapdoor at the stern (unmarked ship)
Players will need to accumulate 44 Gold to begin the trading chain for the IOU. The full chain is as follows:
- Spend 44 Gold to obtain the Yew Shortbow from Peabody at Arrows and Iron (building 15)
- Give the Yew Shortbow to Cuthbert in the alley down the side of the tavern (location C) in exchange for a Rune Essence
- Give the Rune Essence to Everild at the Rune Shop (building 1) in exchange for a Fire Rune
- Give the Fire Rune to Langdon at Iron and Arrows (building 15) in exchange for 10 Cannon Balls
- Give the 10 Cannon Balls to Artemis on the bridge of the ship docked at the Western Pier (location D) in exchange for a Redberry Pie
- Give the Redberry Pie to Thurgo at his shop (building 7) in exchange for a Blurite Sword
- Give the Blurite Sword to Carswell at his shop (building 8) in exchange for a Pirates IOU
Optional Rewards
- Following the first 5 steps of the trade chain again for a second Redberry Pie and obtaining an additional 64 Gold will allow the player to purchase Blurite Leggings from Thurgo (building 7)
- Various other trades for Gold are available. Those are listed here.
Leviathan

With the Pirates IOU in hand, Players can return to the secret entrance to the ship docked at the Central Pier and throw the IOU onto the red square. This opens a secret door which closes behind them. Players can talk to Scared Pirate who will tell them that this ship is Leviathan and ask them to defeat the beast below. They are provided with a Bow, 64 Arrows and 16 Honey Bottles. Leviathan contains a parkour course involving slime block launchers that are activated by shooting target blocks, and sliding on honey blocks. Players should follow the course until they reach the end. Players will receive Mead and mc:Snowballs along the way to help them.
Towards the end of the parkour course is a room labelled "Yarr" which looks like a save point. This is a trap. If players enter the room, they will fall into the Powder Snow and end up in jail. Players should ignore the room and continue the course.
There is also secret reward available, which is the Yarr's Pantaloons. This can be found by exploring off the beaten track a bit. The solution to finding it can be found here.
At the end of the course, player's reach the lorebook Crescent Bay 7 and a big hole to jump down which leads to the boss chamber.
Yarr's Hive

Player's land at Yarr's Hive and find a save point which they should use. The save point room also contains the lorebook The Fate of Yarr. They can then progress until they reach a rail. They are given Yarr's Blunderbuss and a minecart called the Honey Barge which can be placed on rails in adventure mode. The player will automatically be refilled with arrows when they are used. Place the Honey Barge on the rail and press the button to begin the boss fight.
Whilst in the boss room, players are given Slowness VII which prevents them from walking. However they are able to jump. It is intended that the player should remain in the Honey Barge at all times. If they leave the Honey Barge, a new one will be added to the last slot on their hotbar for them to place. Yarr is in the room flying around on Bumble Bee, however both are immune to normal damage. Players can only win this fight by activating the cannons in the roof.
The player must first shoot several targets to progress around the lower track and rise up the ramp to the upper track. Shots need to be timed so that the block moves out of the way as they attempt to pass. Once up onto the upper rail they will start going around in circles on that track. They must always shoot the targets that are in the shape of a plus symbol as they pass, or else they will fall back down to the lower level. The main challenge of the upper level is three consecutive slime block launchers that must be activated at the right time to shoot the minecart up to the next one. If all three are successful, players will reach the roof track.

Players will progress around the roof area on a track which takes them around several target blocks. Each of those target blocks activates a cannon which shoots straight downwards, and players must attempt to activate a cannon just as Yarr and Bumble Bee are directly below it. To aid in targeting, a white wisp floats around the roof area indicating the boss' position. Once a direct hit has been made, the cannons will need to recharge and this won't occur until Players return to the lower areas of the room.
A total of three direct hits are needed to defeat the boss. After defeating it, they player is teleported out of the dungeon and back to safety in the hold of Artemis' ship with their reward.
Rewards
Completing the quest grants a the Honey Barge, a single Arrow, and a Reward Bag which contains:
Players will also obtain the Pirates IOU during the quest and have the opportunity to earn then Blurite Leggings and Yarr's Pantaloons.
Other Items
The following other items are used in the quest:
Patch Notes
Gallery
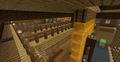
The beginning of the Leviathan parkour course
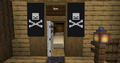
A fake save room
Secret room
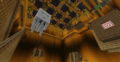
Boss chamber

Relevant Videos